
Restoring Imprinted Concrete Step by Step: The Marbella Villa Driveway
Restoring imprinted concrete is a sequence of five stages: wash, repair, cut in, first coat, final coat. This guide follows one real project, a villa in Marbella, through each of them with the photos taken on site, so you can see what the work involves and what to expect on your own driveway or terrace. It is a description of professional work, not a DIY manual.
Send us a photo and the m²What was the starting point at the Marbella villa?
A long grey driveway in imprinted concrete with a stone pattern, running up to a carport sheltered by a pergola with a reed roof, plus the apron in front of the garage. All of it had faded to a flat, dull grey with patchy areas, and the driveway had a network of cracks.
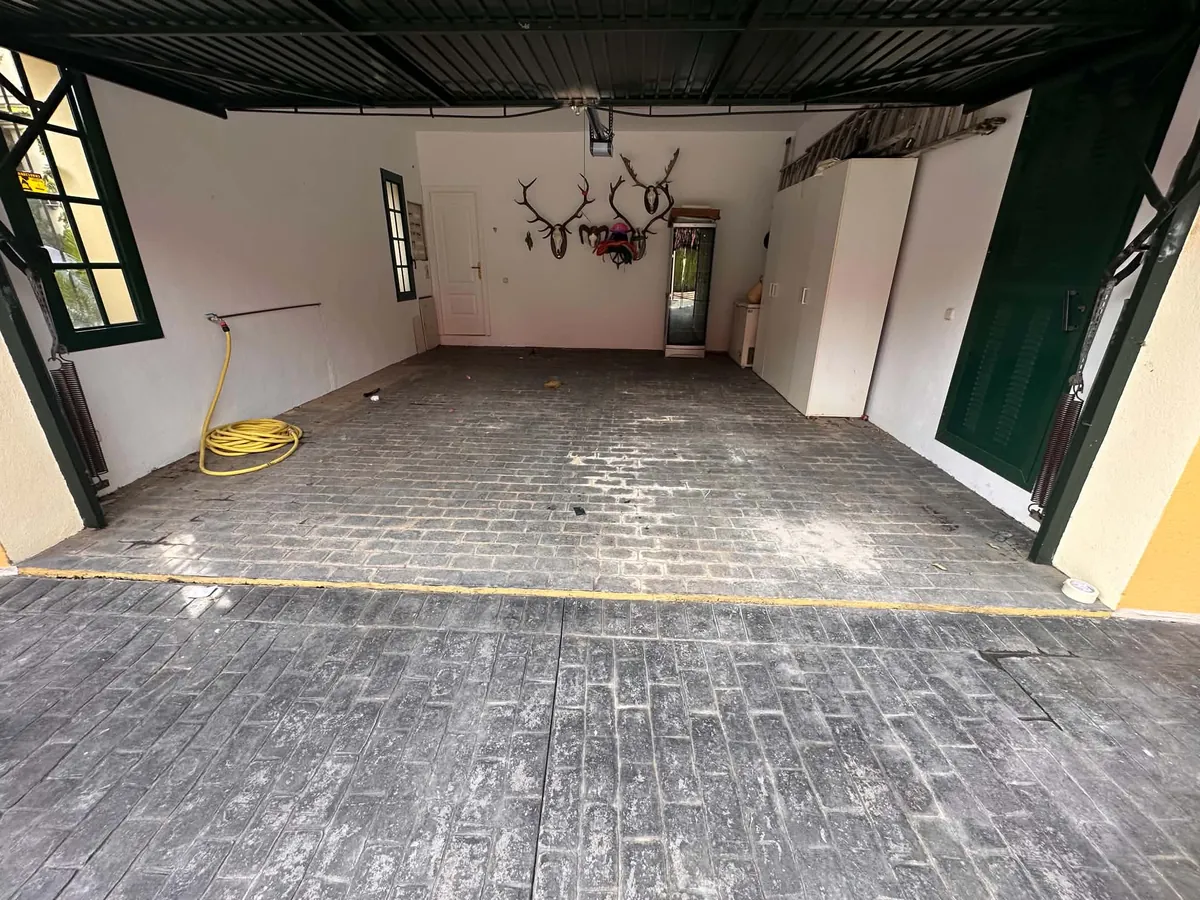
The key observation was that the slab itself was in one piece and level. There were no sunken sections or loose fragments. That made it a restoration job rather than a replacement, which is the decision we explain in repair or replace imprinted concrete.
Why does the work start with pressure washing?
Because the new coating can only bond to clean, sound concrete. Years of dust, organic growth, tyre film and failing old sealer sit on a stamped surface, especially in the recesses of the pattern, and all of it has to go.

Under the pergola, the carport floor was washed with the same care as the open driveway, even though it looked cleaner at first glance. Covered areas often hide fine dust and residues that are just as bad for adhesion.
Where the wash water goes also matters. In Málaga city, for example, the municipal sewer regulation prohibits discharging paints, pigments and water-immiscible solvents into the network, so residues are kept out of drains wherever possible. For other towns, ask the local ayuntamiento (to be verified).
How were the cracks repaired?
Once the surface was clean and dry, each crack was filled so the concrete became continuous again. This is what stops the cracks from showing through the colour and from collecting dirt and water under the new finish.


From a distance, the filled cracks look like a network of lines drawn over the pattern. That is normal at this stage; they disappear visually once the colour goes on. The repaired surface is shown again in the overview below.

The repair does not change why a crack formed. On this driveway the slab was stable, so filled cracks could be expected to stay quiet. Where the ground is moving, the same line can reopen later, which is why movement is checked before quoting.
Why are the edges cut in by hand first?
Because rollers cannot paint tight against a wall, a post or a step without smudging it. The borders are therefore taped where needed and painted with a brush before the open areas, so the final line is crisp.


Under the pergola this meant working around every post and along the house wall. It is slow, careful work, and it is often what separates a finish that looks professional from one that looks improvised.
How was the colour applied?
In two coats of synthetic resin paint. The first coat went down in strips across the carport and driveway, which is how the crew keeps a wet edge and works systematically down a long surface.


At this point the surface still looked uneven, with lighter and darker areas. The second coat is what evens that out and builds the depth of colour. The edges were finished by hand again where needed.

Drying between coats and before reopening followed the product data sheet and the weather on the day. We do not give fixed hours, because those conditions change from one job to the next.
What did the finished driveway look like?
Dark, glossy and uniform from the gate to the carport. The stone pattern stands out clearly again, the repaired cracks no longer catch the eye, and the garage apron matches the rest of the entrance.

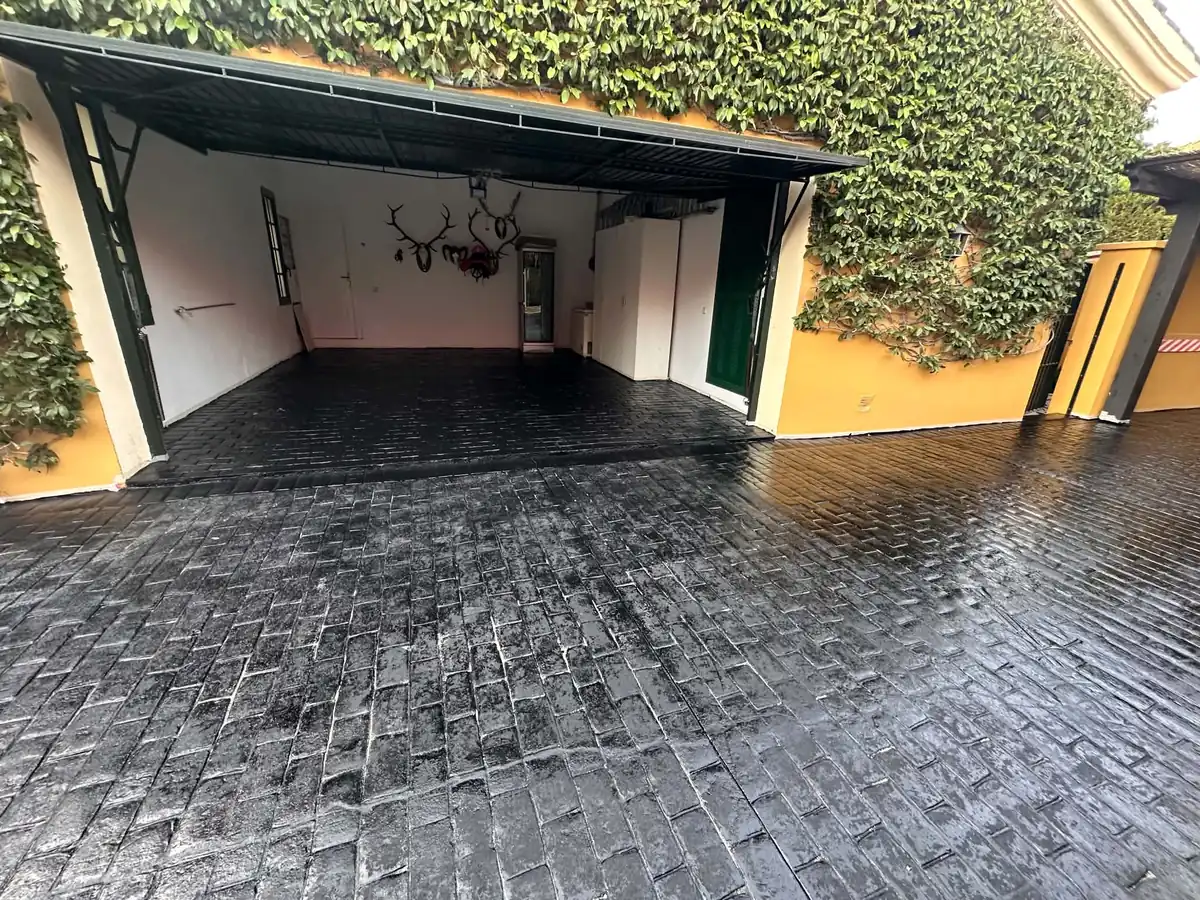

If your surface looks like the before photos, read about imprinted concrete restoration for driveways and our page on faded imprinted concrete. For the coating itself, see resealing and recolouring.
What can owners learn from this project?
- A cracked, faded driveway is not automatically a replacement job; check whether the slab is sound.
- Preparation takes more effort than painting, and it is what makes the finish last as long as the product allows.
- Edges are where quality shows; ask how they will be handled.
- Two coats are not optional; the first coat alone looked patchy here too.
- Photos of each stage are useful for owners who cannot be on site.
One more lesson is about expectations. A restored surface is still the same concrete underneath: the coloured film renews how it looks and gives it a fresh protective layer, but it does not turn an old slab into a new one. Understanding that from the start helps you judge the result on the right terms and be happy with it.
Our article on what can go wrong when recolouring imprinted concrete explains what happens when these steps are skipped.
Frequently asked questions
Was the Marbella driveway replaced in any part?
No. Every part of the driveway, the carport floor and the garage apron was restored in place. The slab was sound and level, so the work consisted of cleaning, crack filling, cutting in and two coats of synthetic resin paint, with no demolition at all.
Why do the filled cracks look so visible in the photos?
Before colouring, the filler stands out against the faded concrete, so the crack network looks dramatic. Once the two coats are applied, the repaired lines blend into the uniform colour. The P22 and P39 photos show the in-between stage, the P31 and P34 photos the result.
What colour was used on the Marbella villa?
The finish is a dark, glossy tone, as you can see in the after photos. We do not publish product names or colour codes on this site. If you like the look, mention the Marbella project when you ask for a quote and we will show you the closest options.
Could this process work on a pool surround?
Yes, the same stages apply. Around a pool there is extra care at the coping, closer attention to residues near the water and a proper conversation about grip, which depends on the product data sheet. Our pool deck page covers those points.
Was the carport under the pergola harder to do?
It needed more brushwork, because of the posts, the wall and the corners. The open driveway is quicker to roll; a covered carport has more edges per square metre. That difference is one of the reasons price depends on the layout and not only on the area.
Why was the first coat applied in strips?
Working in strips lets the crew keep a wet edge and cover a long surface systematically, without lap marks drying in the middle. The strips are visible in the in-progress photos and disappear once the second coat closes the surface into one even colour.
Can I do this myself following the photos?
This guide describes professional work so you know what to expect; it is not a DIY manual. The result depends on preparation, crack repair, edge work and following the product data sheet. If you are weighing it up, our DIY versus professional article goes through the trade-offs.
How long did the Marbella job take?
We do not publish durations, because they depend on the area, the condition, the weather and the drying times of the product. For your own surface, we give a plan based on your photos and dates, and adjust it if the weather turns.
Were the cracks caused by ground movement?
The slab was level and in one piece, with no sunken or lifted sections, which is why restoration was the right choice. We do not claim to know the cause of every crack; we only assess whether the surface is stable enough for a coating to make sense.
Where can I see more photos of this project?
The projects page and the gallery show the complete Marbella series, from the faded driveway through washing, crack repair and edge work to the finished dark surface. The photos are from the site itself, not stock images.